Nahida
"Good morning. We should get going right away. There are too many things in this world that you'll miss if you don't get there on time."The sapling Dendro Archon of wisdom wishes nothing more than to explore the world and see all there is to see. But she’s been locked away in a cage since the moment of her birth. But that doesn’t stop her. She traverses the land of dreams to reach her goal.
Nahida is a powerful off-field dps and buffer. She damages all marked enemies when another enemy is hit with a reaction. She further enhances the potency of reactions by buffing her team’s Elemental Mastery, and supplying them with a constant source of Dendro.
While Nahida is the strongest character for Dendro-reaction teams, she provides next to nothing to any team outside that scope.
| Nahida |
| Physic of Purity |

|
| Rarity | |
| Element | |
| Weapon | |
| Nation | |
| Birthdate | 10/27 |
| Base Stats (Lv.90) | |
| Hp | 10,360 |
| Atk | 299 |
| Def | 630 |
| Ascension | Elemental Mastery: 115 |
| Share |
| Table of Content |
- Materials
- Common Drop
- Local Speciality
- Talent Book
- Normal Boss
- Weekly Boss
- Talents
- Normal Attack
- Skill
- Burst
- Talent Priority
- Passive Talents
- Constellation
- Constellation 1
- Constellation 2
- Constellation 3
- Constellation 4
- Constellation 5
- Constellation 6
- Constellation Priority
- Weapons
- 5* Weapons
- 4* Weapons
- Artifacts
- Desired Stats
- Artifact Sets
- Teammates
Materials
Common Drop
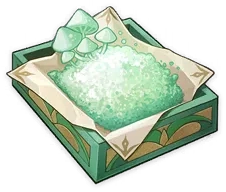 Nahida uses the fungal spore family as her common drops, gathered from the mutated monsters
in her forests.
Local Specialty
 Kalpalata Lotuses are Nahida’s local specialty. They’re found hanging from vines, on the
cliffsides in the forests of Sumeru.
Talent Book
 The Ingenuity family of books are used to level up Nahida’s talents. They’re obtained from
the Witticism domain on Tuesday, Friday, and Sunday.
Normal Boss
 Nahida uses the materials dropped from the long-awaited Dendro hypostasis. Which is ironic
since she can’t deal damage to the boss.
Weekly Boss
 Once a week, Nahida corrects her new assistant, formerly known as Scaramouche, to obtain
Puppet Strings used for her high-level talents.
Talents
Normal Attack: Akara

Normal Attack: "Performs up to 4 attacks that deal Dendro DMG to opponents in front of her."
Charged Attack: "Consumes a certain amount of Stamina to deal AoE Dendro DMG to opponents in front of her after a short casting time."
Plunging Attack: "Calling upon the might of Dendro, Nahida plunges towards the ground from mid-air, damaging all opponents in her path. Deals AoE Dendro DMG upon impact with the ground."
Nahida’s normal attack is typical of other catalyst users. The keyboard and mouse motif is amusing because she's the avatar of Irminsul; a metaphorical supercomputer.
The normal attack is very low priority. It only scales with attack while the rest of her kit scales with Elemental Mastery.
Elemental Skill: All Schemes to Know
 Seed of Skandha"Opponents who have been marked by the Seed of Skandha
will be linked to one another up till a certain distance.
After you trigger Elemental Reactions on opponents who are affected by the Seeds of
Skandha or when they take DMG from Dendro Cores (including Burgeon and Hyperbloom DMG),
Nahida will unleash Tri-Karma Purification on the opponents and all connected opponents,
dealing Dendro DMG based on her ATK and Elemental Mastery.
You can trigger at most 1 Tri-Karma Purification within a short period of time."
Energy Generation: 3 particles (on Tri-Karma Purification; 7s CD)
Press
Nahida’s skill, whether held or pressed, performs the same function. The difference is the press version has a faster casting animation and 1 second less cooldown. But at the cost of an extremely limited area of effect. Press should only be used when fighting one boss in close quarters.
Hold
The Hold variation is more versatile and widely used than Press. It takes longer to cast, but the range is massive. It can reliably mark every enemy within sight.
Nahida’s Skill is the highest priority for herself and account-wide. It’s the source of 99% of her damage and a mini-nuke to an entire field of enemies.
Elemental Burst: Illusory Heart
 Energy
Cost: 50 "Manifests the Court of Dreams and expands the Shrine of
Maya."
Energy
Cost: 50 "Manifests the Court of Dreams and expands the Shrine of
Maya.""When the Shrine of Maya field is unleashed, the following effects will be separately unleashed based on the Elemental Types present within the party.
·Pyro: While Nahida remains within the Shrine of Maya, the DMG dealt by Tri-Karma Purification from "All Schemes to Know" is increased.
·Electro: While Nahida remains within the Shrine of Maya, the interval between each Tri-Karma Purification from "All Schemes to Know" is decreased.
·Hydro: The Shrine of Maya's duration is increased."
"If there are at least 2 party members of the aforementioned Elemental Types present when the field is deployed, the aforementioned effects will be increased further."
"Even if Nahida is not on the field, these bonuses will still take effect so long as party members are within the Shrine of Maya."
On its own, Nahida’s Burst does only one thing: buffs her Skill’s damage based on her teammates’ element. But be aware only Pyro, Hydro, or Electro have any effect. Later on, we’ll cover her Talent, which greatly enhances it.
Leveling Illusory Heart is a good use of resources, but it’s not a major priority compared to other teammates’ Talents. Leveling up only affects the buffs to her Skill, and not the extra buffs provided by her Passive.
Overall Talent Priority
Passive Talents
On All Things Meditated
 "Nahida can use All Schemes
to Know to interact with some harvestable items within a fixed AoE. This skill may even
have some other effects..."
"Nahida can use All Schemes
to Know to interact with some harvestable items within a fixed AoE. This skill may even
have some other effects..."On All Things Meditated is extremely unique. Not only does it pick up hard-to-reach harvestable items, it also reads the minds of Sumeru NPCs. Currently, the dialogue is limited to NPCs in Sumeru’s overworld, quests, and events. It’s highly unlikely to extend to future nations, like Fontaine.
Compassion Illuminated
 "When
unleashing Illusory Heart, the Shrine of Maya will gain the following effects:
The Elemental Mastery of the active character within the field will be increased by 25% of the Elemental Mastery of the party member with the highest Elemental Mastery. You can gain a maximum of 250 Elemental Mastery in this manner."
Compassion Illuminated adds a teamwide buff to Nahida’s Burst. She grants the entire team up to 250 Elemental Mastery, which is the largest EM buff to date. Not only does EM increase reaction damage, it also increases the raw damage of Skills that scales off it, like Nahida’s own.
Awakening Elucidated
 "Each
point of Nahida's Elemental Mastery beyond 200 will grant 0.1% Bonus DMG and 0.03% CRIT
Rate to Tri-Karma Purification from All Schemes to Know.
A maximum of 80% Bonus DMG and 24% CRIT Rate can be granted to Tri-Karma Purification in
this manner."
"Each
point of Nahida's Elemental Mastery beyond 200 will grant 0.1% Bonus DMG and 0.03% CRIT
Rate to Tri-Karma Purification from All Schemes to Know.
A maximum of 80% Bonus DMG and 24% CRIT Rate can be granted to Tri-Karma Purification in
this manner."Awakening Elucidated further encourages Nahida to build Elemental Mastery. Every 33 EM above 200 gives her 1% Crit Rate and 3.3% Dendro DMG. 1,000 Elemental Mastery is needed to gain the maximum bonus of 24% Crit and 80% Dendro DMG.
Nahida has excellent internal synergy with her Passive Talents and Burst. When considering her 1st passive, she only needs 800 Elemental Mastery to reach the 1,000 EM mark. When standing in the field created by her Burst, she gains 25% of 800, which is 200 EM.
Constellation
Constellation 1: The Seed of Stored Knowledge
 "When the Shrine of
Maya is unleashed and the Elemental Types of the party members are being tabulated, the
count will add 1 to the number of Pyro, Electro, and Hydro characters respectively."
The Seed of Stored Knowledge theoretically allows Nahida to build more flexible teams. But in reality, it’s just a minor personal buff. The flexibility doesn’t extend too far as she still only wants teammates of Pyro, Hydro, or Electro.
Constellation 2: The Root of All Fullness
 "Opponents that are
marked by Seeds of Skandha applied by Nahida herself will be affected by the following
effects:
·Burning, Bloom, Hyperbloom, and Burgeon Reaction DMG they receive can score CRIT Hits. CRIT Rate and CRIT DMG are fixed at 20% and 100% respectively.
·Within 8s of being affected by Quicken, Aggravate, Spread, DEF is decreased by 30%."
Nahida’s 2nd Constellation seems like a complicated boost to reaction damage, but it’s fairly simple. Burning, Bloom, Hyperbloom, and Burgeon have a 20% chance to deal double damage. This comes to an average 20% damage buff for those reactions.
The second part is more powerful, as it reduces enemy defenses when affected by Quicken, Aggravate, or Spread. This DEF decrease affects most sources of damage, including some reactions and Skills.
The Root of All Fullness is the best stopping point if going for Constellations.
Constellation 3: The Shoot of Conscious Attainment
 "Increases the Level
of All Schemes to Know by 3.
Maximum upgrade level is 15."
Constellation 3 increases Nahida’s Skill level.
Constellation 4: The Stem of Manifest Inference
 "When 1/2/3/4 (or
more) nearby opponents are affected by All Schemes to Know's Seeds of Skandha, Nahida's
Elemental Mastery will be increased by 100/120/140/160."
Nahida’s 4th Constellation is a minor personal buff. There isn’t anything special or spectacular about it.
Constellation 5: The Leaves of Enlightening Speech
 "Increases the Level
of Illusory Heart by 3.
Maximum upgrade level is 15."
The Leaves of Enlightening Speech is a Burst level-up.
Constellation 6: The Fruit of Reason's Culmination
 "When Nahida hits an
opponent affected by All Schemes to Know's Seeds of Skandha with Normal or Charged
Attacks after unleashing Illusory Heart, she will use Tri-Karma Purification: Karmic
Oblivion on this opponent and all connected opponents, dealing Dendro DMG based on 200%
of Nahida's ATK and 400% of her Elemental Mastery."
"DMG dealt by Tri-Karma Purification: Karmic Oblivion is considered Elemental Skill DMG and can be triggered once every 0.2s."
"This effect can last up to 10s and will be removed after Nahida has unleashed 6 instances of Tri-Karma Purification: Karmic Oblivion."
The Fruit of Reason’s Culmination turns Nahida into an on-field nuker. To put this into perspective, this new attack hits harder than her Skill at level 10. But there are several requirements.
First, Nahida has to use her burst. Then mark enemies with her Skill. And finally, deal damage to them with her normal or charged attacks.
Tl;dr is Teammate set up -> Nahida Burst -> Skill -> Normal/Charged 6 times -> Repeat.
Constellation Final Thoughts
Weapons
 5*
Weapons
 A
Thousand Floating Dreams
Sub Stat: Elemental Mastery 265
A Thousand Nights' Dawnsong: (R1) "Party members other than the equipping character will provide the equipping character with buffs based on whether their Elemental Type is the same as the latter or not. If their Elemental Types are the same, increase Elemental Mastery by 32. If not, increase the equipping character's DMG Bonus from their Elemental Type by 10%. Each of the aforementioned effects can have up to 3 stacks. Additionally, all nearby party members other than the equipping character will have their Elemental Mastery increased by 40. Multiple such effects from multiple such weapons can stack."
Nahida’s signature weapon is her best-in-slot. It has the highest Elemental Mastery sub-stat available, and further enhances her stats based on the team’s elemental type.
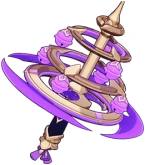 Kagura's Verity
Sub Stat: Crit Dmg 66.2%
Kagura Dance of the Sacred Sakura: (R1) "Gains the Kagura Dance effect when using an Elemental Skill, causing the Elemental Skill DMG of the character wielding this weapon to increase by 12% for 16s. Max 3 stacks. This character will gain 12% All Elemental DMG Bonus when they possess 3 stacks."
Kagura’s Verity is a great option as well. It swaps Elemental Mastery for Crit DMG, which is Nahida’s 2nd most important stat. Although it does take Nahida a bit longer to obtain maximum stacks, compared to Yae Miko, she still reaches it with relative ease.
 4*
Weapons
 The Widsith
Sub Stat: Crit Dmg 55.1%
Debut: (R5) "When the character takes the field, they will gain a random theme song for 10s. This can only occur once every 30s. Recitative: ATK is increased by 120%. Aria: Increases all Elemental DMG by 96%. Interlude: Elemental Mastery is increased by 480."
The Widsith is the 4* version of Kagura’s Verity. It performs similarly, but has lower uptime on the passive. The 10-second up-time, 20-second down-time is a major drawback.
 Mappa Mare
Sub Stat: Elemental Mastery 110
Infusion Scroll: (R5) "Triggering an Elemental reaction grants a 8% Elemental DMG Bonus for 10s. Max 2 stacks."
Mappa Mare is the 4* version of A Thousand Floating Dreams. It has less overall stats, but it’s craftable.
Artifacts
Desired Stats
 Sands of Eon
Elemental Mastery on the Sands pieces is the best choice, no matter what weapon Nahida is using. Use an EM Sands even if it has sub-optimal substats.
 Goblet of
Eonothem
The Goblet piece should also be Elemental Mastery for most players. The only time Dendro DMG% should be considered is when Nahida has already reached 800 Elemental Mastery without it. And even then, getting to 1,000 EM is more beneficial since it’ll boost her teamwide buff by another 50 EM.
 Circlet of Logos
Running either a Crit DMG% or Elemental Mastery Circlet depends on the equipped weapon. Use Crit DMG% if running an EM substat weapon. And use EM if running a Crit DMG or RATE% weapon.
Sub Stats
Elemental Mastery is Nahida’s first stat to focus on. She has two marks to reach; 800 and 1,000. At 800 EM, she’ll provide 200 EM to herself and her team when unleashing her Burst. This will bump her up to the 1,000 mark, granting her the maximum 24% Crit Rate and 80% Dendro DMG from her other Talent.
The 1,000 mark won’t grant her any additional Crit Rate or Dendro DMG%, but it will provide herself and her team an additional 50 EM, maxing it out at 250.
First, decide which benchmark you’ll strive to reach. Then play with artifact bonuses, sub-stats, weapon subs, and artifact main stats. Remember, Nahida gains 115 EM from leveling up, and each artifact's main stat gives an additional 186.
After Elemental Mastery, Nahida’s 2nd focus will likely be Crit DMG%. She gains 24% Crit Rate from her Talent, so there’ll need to be more Crit DMG% stats to reach the perfect 1:2 ratio.
Energy Recharge% can be added last after a good Crit ratio has been achieved.
Deepwood Memories
 2-Pieces:
"Dendro DMG Bonus +15%."
4-Pieces: "After Elemental Skills or Bursts hit opponents, the targets' Dendro RES will be decreased by 30% for 8s. This effect can be triggered even if the equipping character is not on the field."
Nahida has two remarkable artifact sets available, each with simple reasons to use one over the other.
If no one on the team is equipped with Deepwood Memories, use it as Nahida’s set. The 30% Dendro RES shred is invaluable. Since Dendro can’t be swirled by Anemo, it can’t be reduced with Viridescent Venerer.
Gilded Dreams
 2-Pieces:
"
Increases Elemental Mastery by 80."
4-Pieces: "Within 8s of triggering an Elemental Reaction, the character equipping this will obtain buffs based on the Elemental Type of the other party members. ATK is increased by 14% for each party member whose Elemental Type is the same as the equipping character, and Elemental Mastery is increased by 50 for every party member with a different Elemental Type. Each of the aforementioned buffs will count up to 3 characters. This effect can be triggered once every 8s. The character who equips this can still trigger its effects when not on the field."
Use Gilded Dreams when another teammate has Deepwood Memories equipped. This set will increase her overall damage more in this situation.
Teammates
Rainbow Teammates
Nahida’s extremely high Dendro application allows her to be the solo Dendro unit to great effect. She can be paired with another Dendro character, but it’s usually to enhance their damage and not her own.
Non-Geo, Anemo, or Cryo Teammates
Sometimes Anemo can be an exception, since they swirl a chain reaction of elemental reactions. But most of the time, just running an additional Pyro, Hydro, or Electro unit is better.
